本文实例为大家分享了Ajax实现异步加载数据的具体代码,供大家参考,具体内容如下
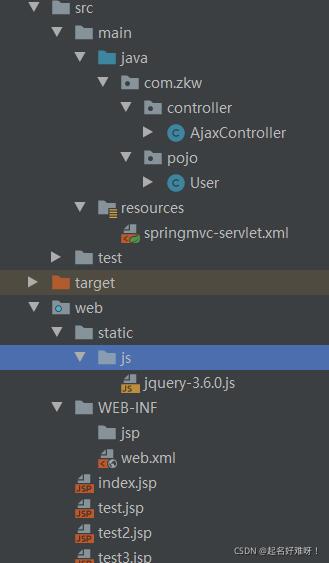
项目结构如下 (需要导入一个JQuery的包,配置文件web.xml和springmvc-servlet.xml,不在写了,不知道的可以看一下我其它的博客,上边都有)

首先创建一个实体类
import lombok.AllArgsConstructor;
import lombok.Data;
import lombok.NoArgsConstructor;
@Data @AllArgsConstructor @NoArgsConstructor
public class User {
private String name;
private int age;
private String sex;
}
然后创建一个Controller
import com.zkw.pojo.User;
import org.springframework.web.bind.annotation.RequestMapping;
import org.springframework.web.bind.annotation.RestController;
import javax.servlet.http.HttpServletRequest;
import javax.servlet.http.HttpServletResponse;
import java.io.IOException;
import java.util.ArrayList;
import java.util.List;
@RestController
public class AjaxController {
@RequestMapping(“/a2”)
public List<User> test2(){
List<User> userList=new ArrayList<User>();
userList.add(new User(“七七”,1,”女”));
userList.add(new User(“琪琪”,1,”女”));
userList.add(new User(“琦琦”,1,”女”));
return userList;
}
}
最后创建一个jsp页面
<html>
<head>
<title>Ajax异步数据加载</title>
<script src=”https://www.jb51.net/article/${pageContext.request.contextPath}/static/js/jquery-3.6.0.js”></script>
<script>
$(function () {
$(“#btn”).click(function () {
$.post(“${pageContext.reques-t.contextPath}/a2″,function (data) {
var html=””;
for (let i=0; i < data.length; i++){
html +=”<tr>” +
“<td>” + data[i].name +”</td>”+
“<td>” + data[i].age +”</td>”+
“<td>” + data[i].sex +”</td>”+
“</tr>”
}
$(“#content”).html(html);
})
})
})
</script>
</head>
<body>
<input type=”button” value=”加载数据” id=”btn”>
<table>
<thead>
<tr>
<td>姓名</td>
<td>年龄</td>
<td>性别</td>
</tr>
</thead>
<tbody id=”content”></tbody>
</table>
</body>
</html>
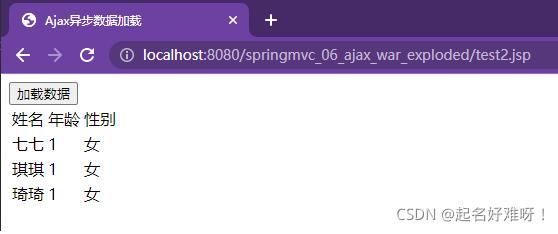
结果如下

用户登录的异步验证
先创建一个Controller
import com.zkw.pojo.User;
import org.springframework.web.bind.annotation.RequestMapping;
import org.springframework.web.bind.annotation.RestController;
import javax.servlet.http.HttpServletRequest;
import javax.servlet.http.HttpServletResponse;
import java.io.IOException;
import java.util.ArrayList;
import java.util.List;
@RestController
public class AjaxController {
@RequestMapping(“/a3″)
public String test3(String username,String pwd){
String msg=””;
if (username !=null){
if (username.equals(“admin”)){
msg=”ok”;
}else{
msg=”用户名不存在”;
}
}
if (pwd !=null){
if (pwd.equals(“123456″)){
msg=”ok”;
}else{
msg=”密码输入错误”;
}
}
return msg;
}
}
然后创建一个jsp页面
<html>
<head>
<title>用户登录</title>
<script src=”https://www.jb51.net/article/${pageContext.request.contextPath}/static/js/jquery-3.6.0.js”></script>
<script>
function a1() {
$.post({
url:”${pageContext.request.contextPath}/a3″,
data:
</script>
</head>
<body>
<p>
用户名:<input type=”text” id=”username” οnblur=”a1()”>
<span id=”userInfo”></span>
</p>
<p>
密码名:<input type=”password” id=”pwd” οnblur=”a2()”>
<span id=”pwdInfo”></span>
</p>
</body>
</html>
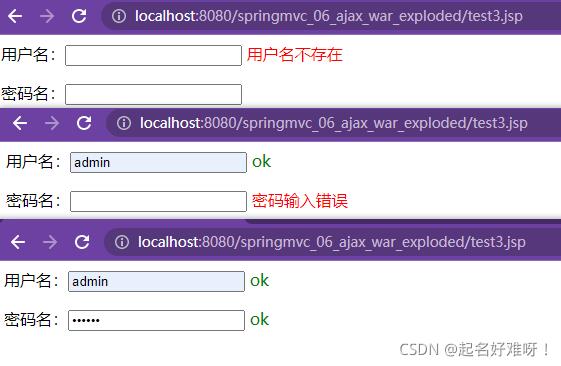
结果如下

以上就是本文的全部内容,希望对大家的学习有所帮助,也希望大家多多支持脚本之家。


